Monday, January 13, 2014

Removing the couch and fridge for wiring

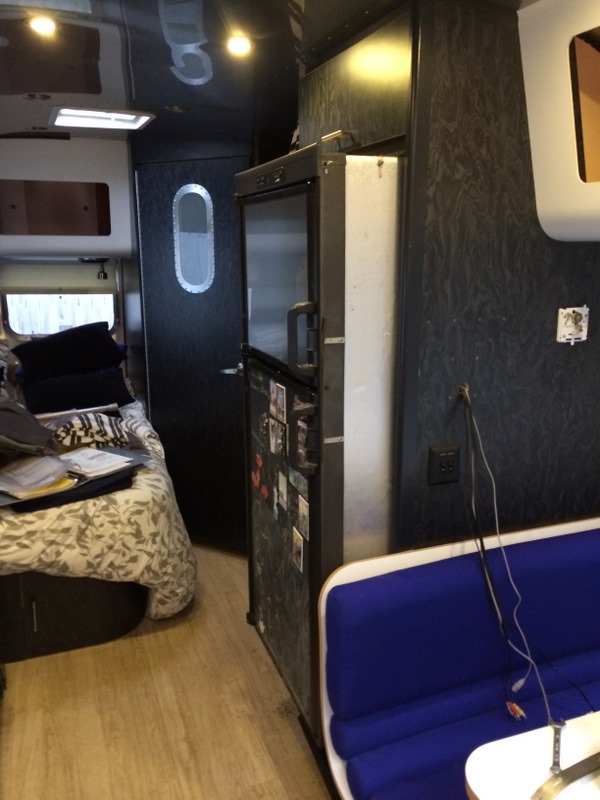
Installing the solar on the new trailer seems like a good place to start, both because I’m pretty intimidated by the prospect and because I know the wires will need to be routed behind and underneath everything. We’re planning on running the connections from the panels down the refrigerator vent and then forward to the batteries. When Dave and Kelly from Wandering with Purpose visited us a couple months ago, we noticed that unlike on their trailer where wires needed to be fed through a channel underneath the hallway to get to the other side of the coach, we had access to an enclosed cable run beneath the side dinette that would take us all the way to the batteries in the front.

IMG_9556

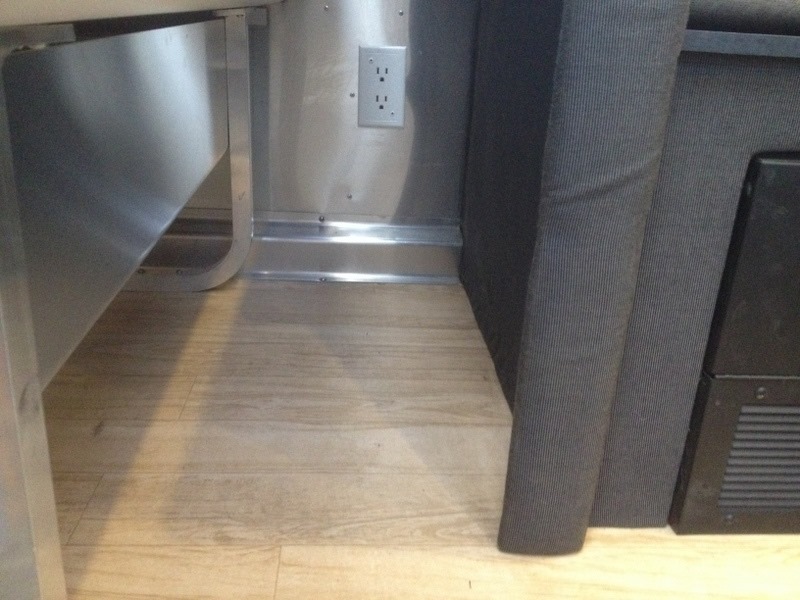
I started removing screws starting on the left side of the aluminum cover and moving right until I noticed that the cover extended under the arm of the L portion of the couch. I removed the screws holding the plywood platform for the L - noting that the access panel Airstream includes provides access to… oh… let’s see… the subwoofer only and not the converter charger or anything you might actually need to work on, I’ll want to make this a full length access like we had on our 19’ – and found that the cable chase extended 6 inches under the arm. No biggie, I’d just take the arm off.

IMG_9557

IMG_9558

IMG_9559

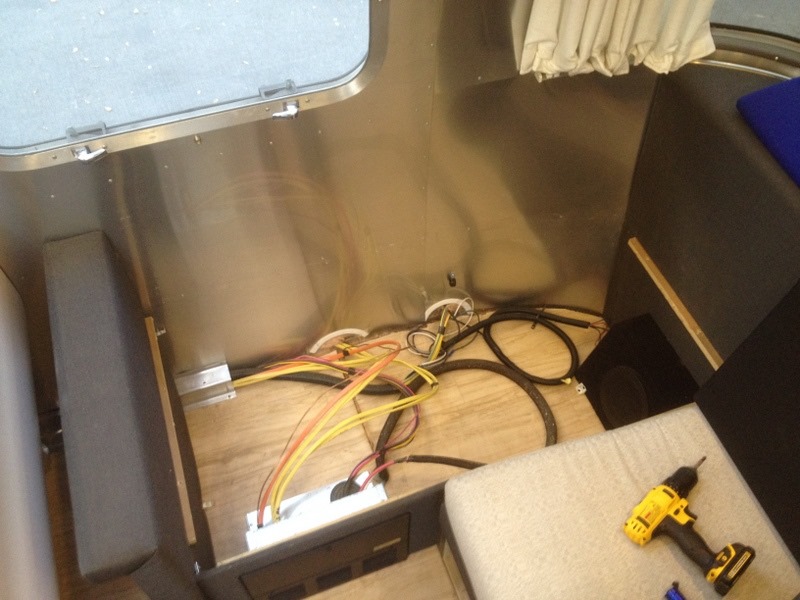
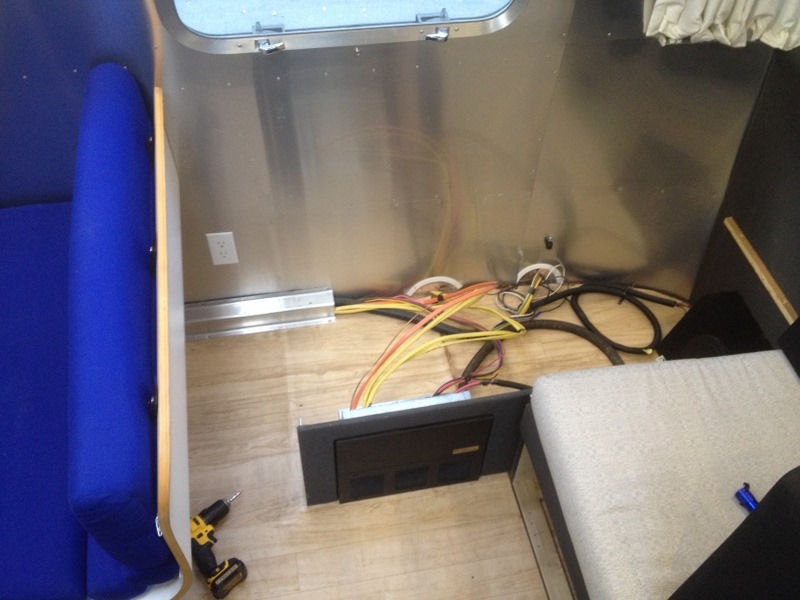
Nice, there’d be a lotta space to work here, including room for the updated inverter/charger we wanted to install. But wait, all the battery connections are behind the backrest panel accessible only through a small opening, another access panel I’ll want to extend. Fair enough, I really wanted to follow the example Dave had set in his great write up of his solar install and keep all the wiring really clean, so I’d have to pull out the backrest to be able to work. After a somewhat maddening search for every screw that held the backrest in place, including removing the other armrest and front lower curtain track before realizing that there were two more screws inside the flip up storage compartment, Ann and I managed to slide the large piece out.

IMG_9560

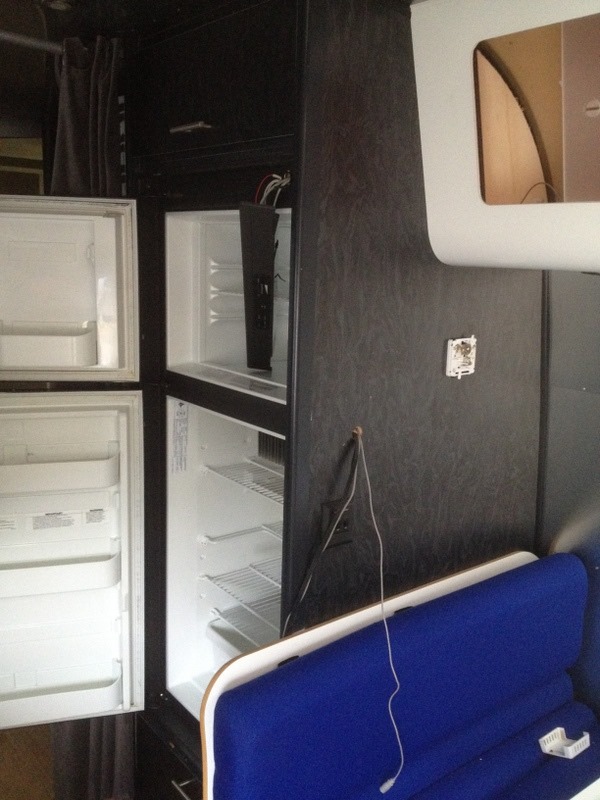
Well, now the main couch base just looks silly sitting there all by itself. Plus, it’d be really easy to pull it and be able to deliver the entire couch assembly to an upholsterer rather than just doing the cushions. So yeah, removing the cover to a small cable chase ended up leading to the entire couch being out. Note the spaghetti wires coming through the front of the coach from the battery compartment. Stick around, I think you’ll find this is the way these things tend to go with me…

IMG_9563

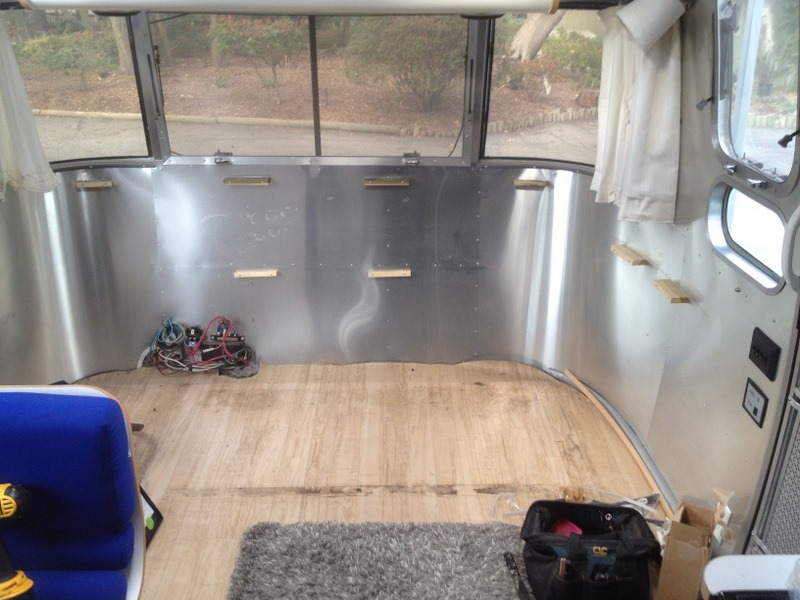
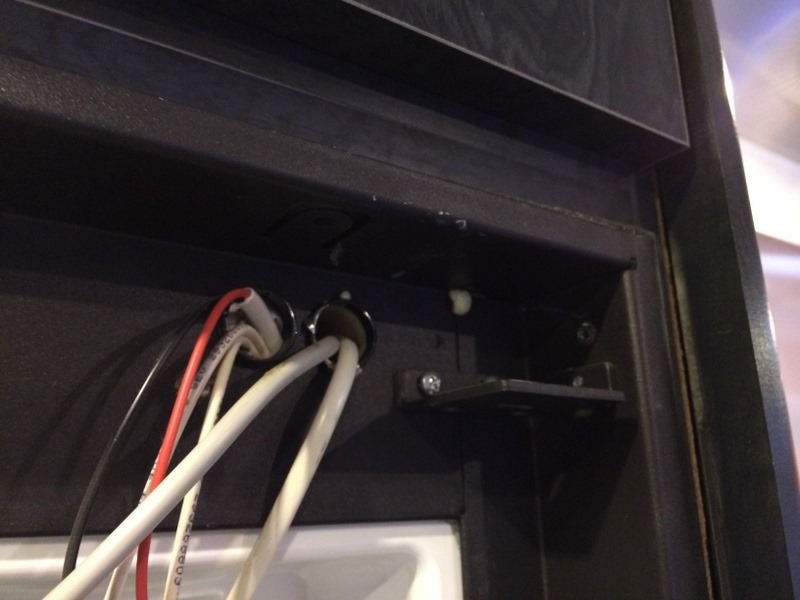
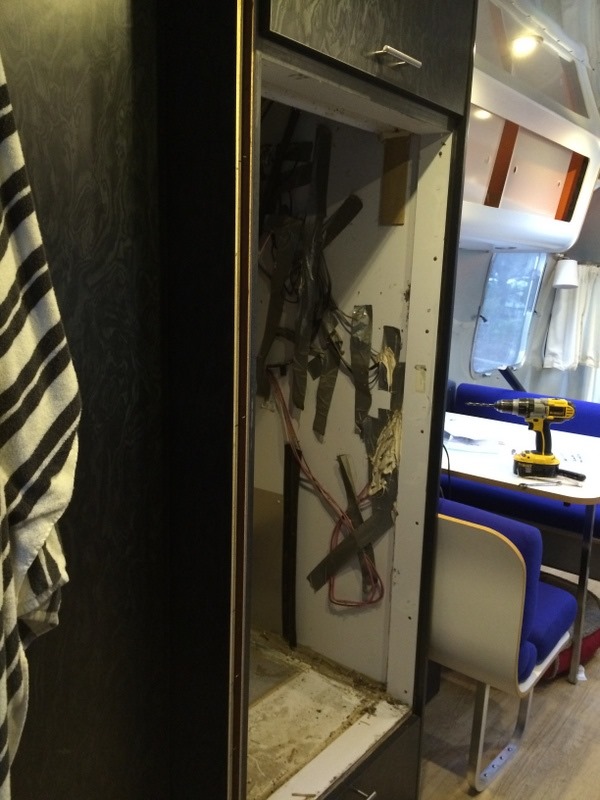
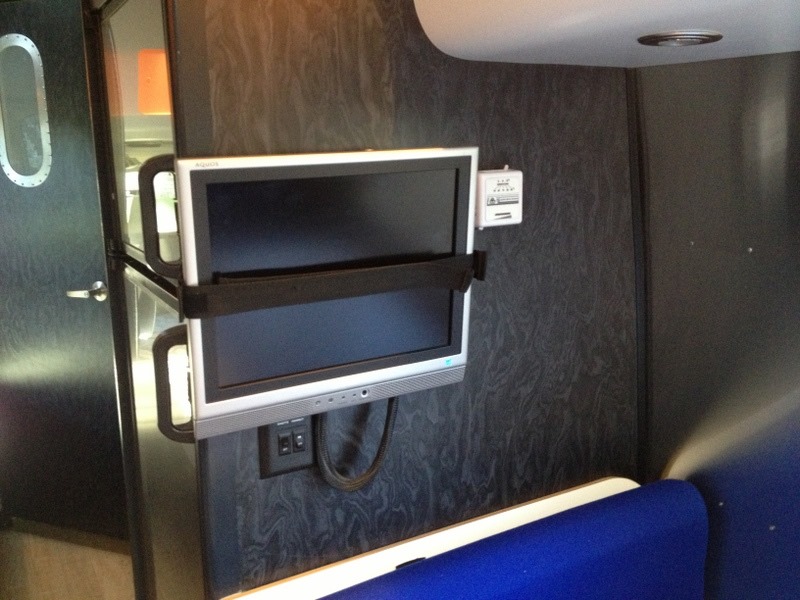
Need another example? One of the first things we did was remove the old, tiny 4:3 ratio TV that had come with this 2005 model. We measured carefully and bought an LG 26" LED TV that fits perfectly on the same wall on a swivel and tilt mount that will allow it to swing 180 degrees for viewing from the bedroom. There were a couple problems: first, no HDMI cables to run from the AppleTV or a laptop and second, the TV would cover the thermostat. Jamming a finger into the hole where the AV wires came out of the wall, the space felt pretty tight. I wasn’t looking forward to the prospect of fishing wires down or fishing them up to where I’d mount a new digital programmable thermostat. The solution? Remove the fridge and have complete access to the inside of that wall.

IMG_9568

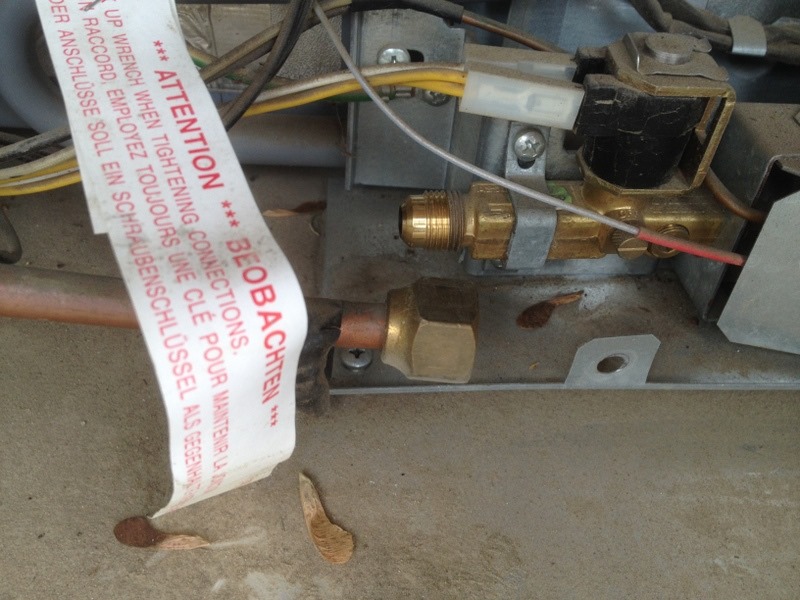
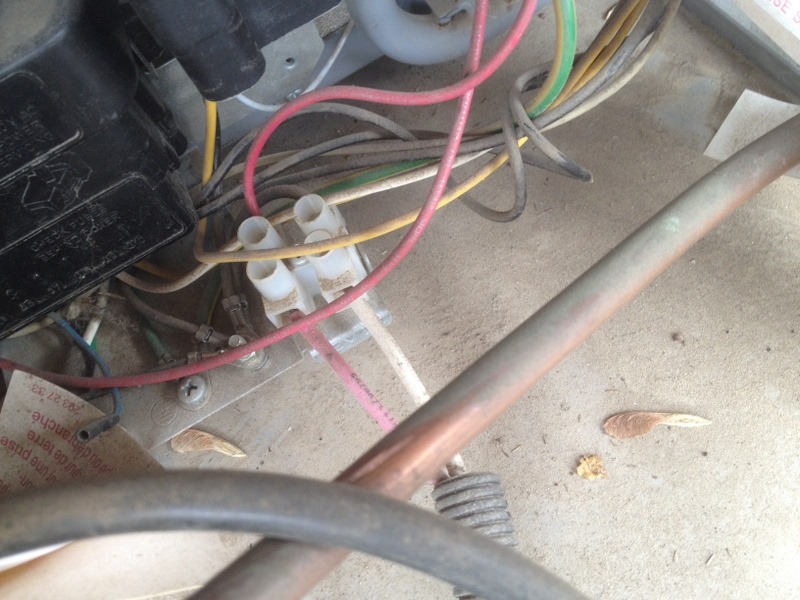
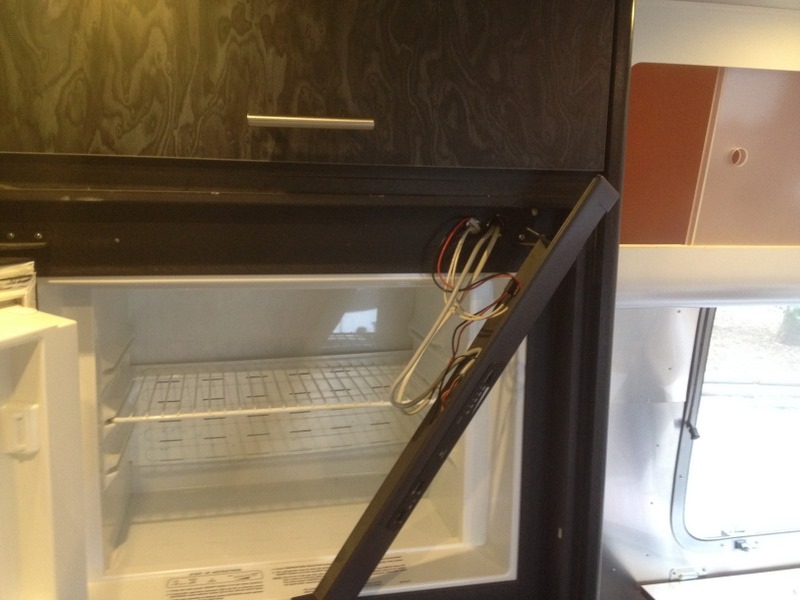
After detaching the gas, 12V and 110V connections in the back, I found the six screws the Dometic manual had told me would be there; two at the bottom front going through the hinges, two accessible through the exterior vent and going into the “feet,” and two at the top front behind the control panel. Well, actually, I found five of them; One of the top front was missing. Oh, and when I went to remove the other top front one, the head broke off leaving a screw shaft just barely poking through the hole. A note for anyone undertaking the same process: In my case, this screw was actually going through the metal trim at the upper right side of the fridge, instead of through the expected holes in the top trim.  

IMG_9565 IMG_9567

IMG_9564 IMG_9595

I stuck a whirring drill bit into the hole in an attempt to demolish the remaining screw shaft. After much work, all I succeeding in doing was widening the original hole. Turns out, that gave me enough space to stick some pinch nose pliers in there “Operation Game-style” and twist the remainder out. See? Not everything turns into an epic project for me. But wait, the fridge still won’t budge even with my yanking on it so hard that the trailer coulda used a “don’t come knockin’” sign. I found a mention on the forums of caulking under the feet and did my best with a putty knife to break the bond in the front and back. Now it would slide forward but would always catch at a certain point. I removed a side trim piece from the cabinet but couldn’t see anything more. Finally, with just the right amount of shoulder pressure pushing against the stripped carcass of a once perfectly functional fridge, I saw the shaft of the second top front screw peeking through the hole on the other side, this one having lost its head before I even started the project. Ugh. This time, I just  bored out a larger hole and went right in with my pliers to twist it out. “It takes a very steady hand…”

IMG_9597

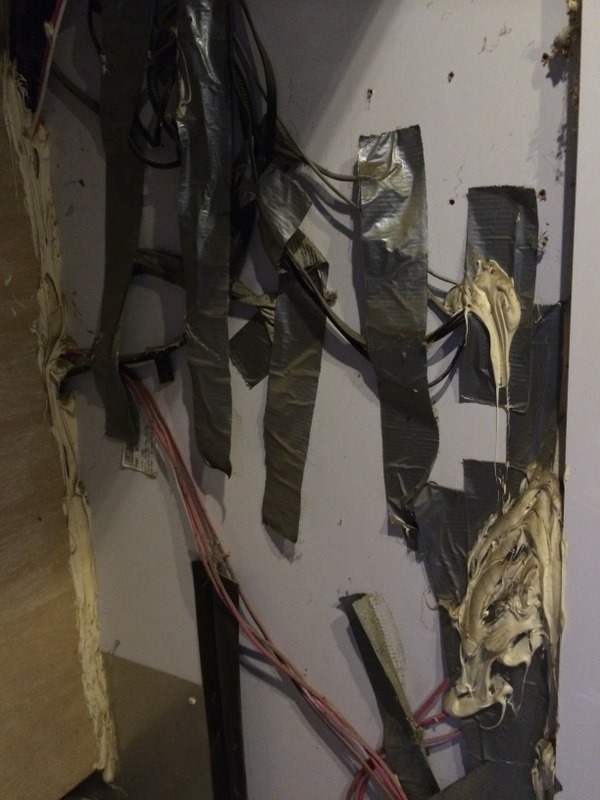
And with that, the fridge slipped out (with some help from our burly uncle who just happened to be visiting that afternoon). Hey Airstream, nice work on securing the wiring. Is that duct tape and globs of adhesive up to code? C’mon guys…

IMG_9599 IMG_9603

With everything now wide open, I think we’re ready to start laying out the panels on the roof and figuring out what wiring goes where. While we’re at it, we’ll run an antenna cable (or two) for various wifi/cell boosters we might install in the future.

Friday, January 10, 2014

2005 Airstream International CCD 25’ Modifications

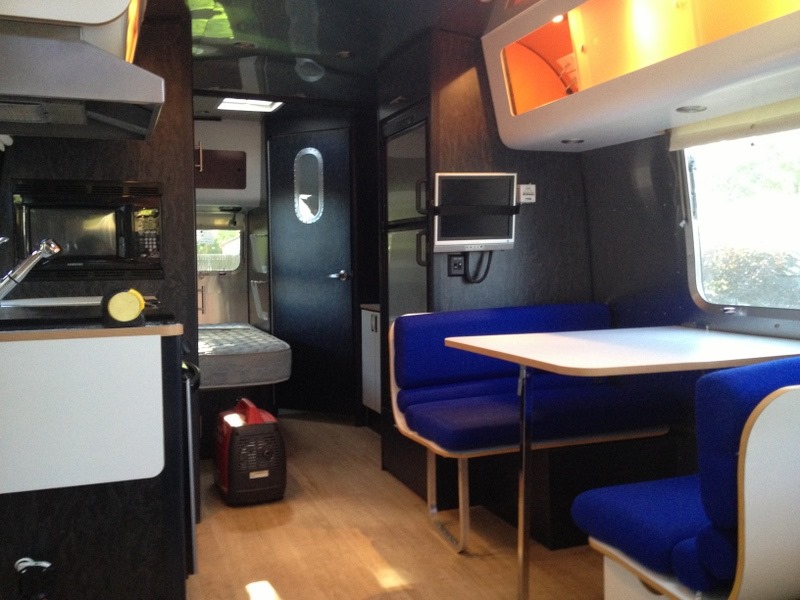
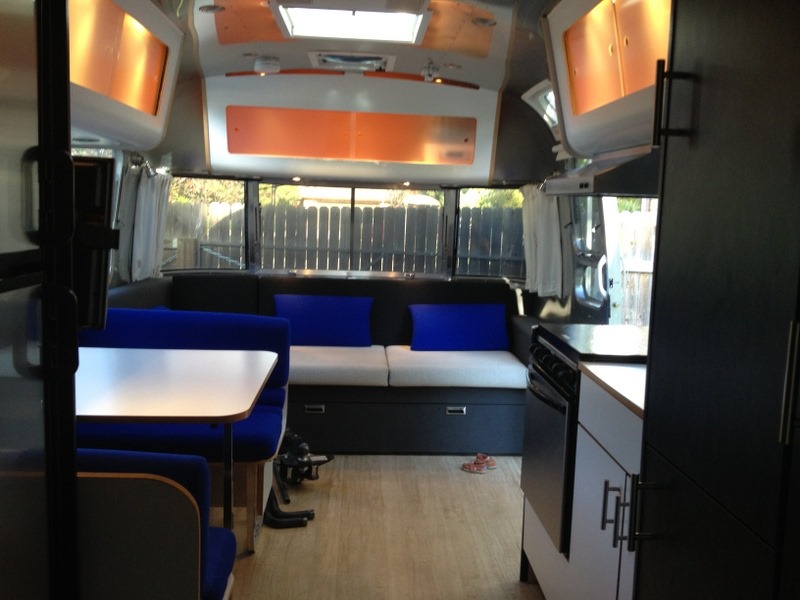
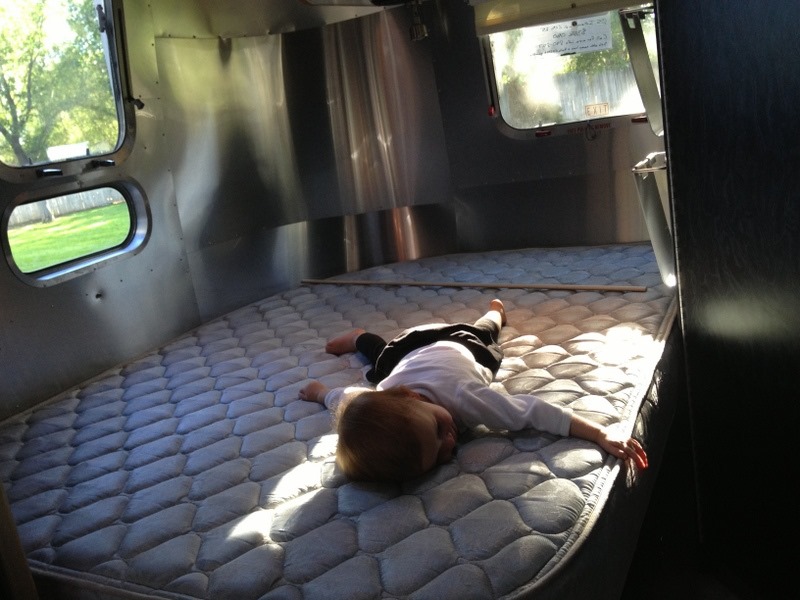
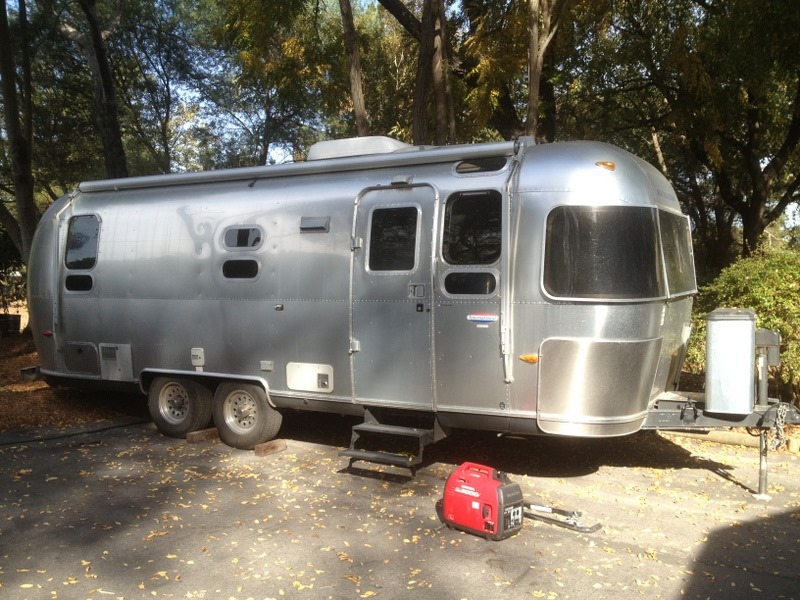
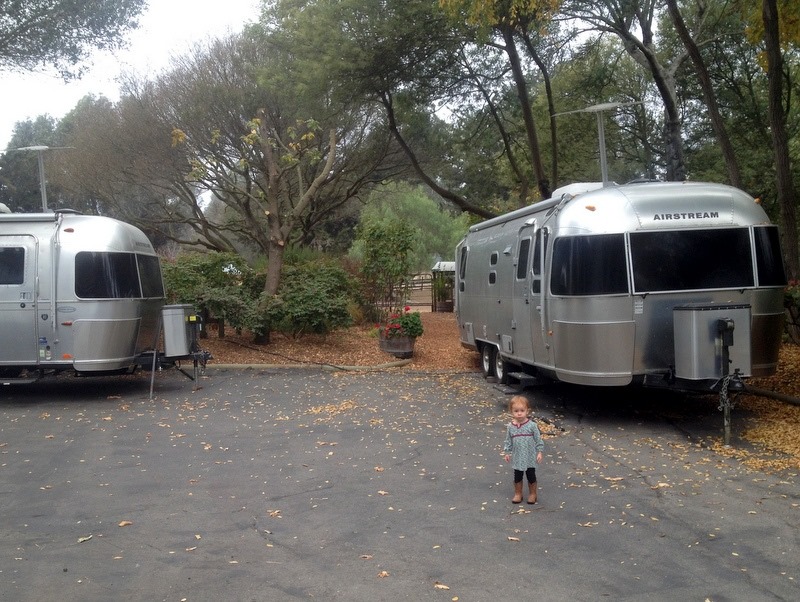
After about two years of travel in our 2012 Airstream Flying Cloud 19’, including more than 100 days camping in 2013, and many nights debating the various floorplans that have been available over the years, we decided that a 25’ model with the rear corner bed, a side dinette and a full L-shaped couch in the front would be an ideal setup for our small family (one toddler when we started looking, but now there’s a new addition!) and some extended travel we have in mind. We found the perfect 2005 CCD 25’ in Boise, ID and had it transported to us in Northern CA. While the floorplan put everything basically in the right place, we had a substantial list of modifications we wanted to do in order to get it ready for our style of camping and to make it our own. Check out our Pinterest board for some of the inspiration we found online.

Read along as we renovated this sporty blue and orange RV into into a warm, organic, silver tiny home where we hope to spend many cozy nights on the road as a family. You can also skip down to the before pictures, a list of mods (and links to related posts) and pics of the finished product.
Stories of the renovation:

The “before” pictures (click any picture to see it larger):
IMG_4246-001IMG_4227-001IMG_4240-001IMG_4226-001IMG_4269-001IMG_4267-001

Our list of mods:

Systems

All things electric, water, propane, sewer.
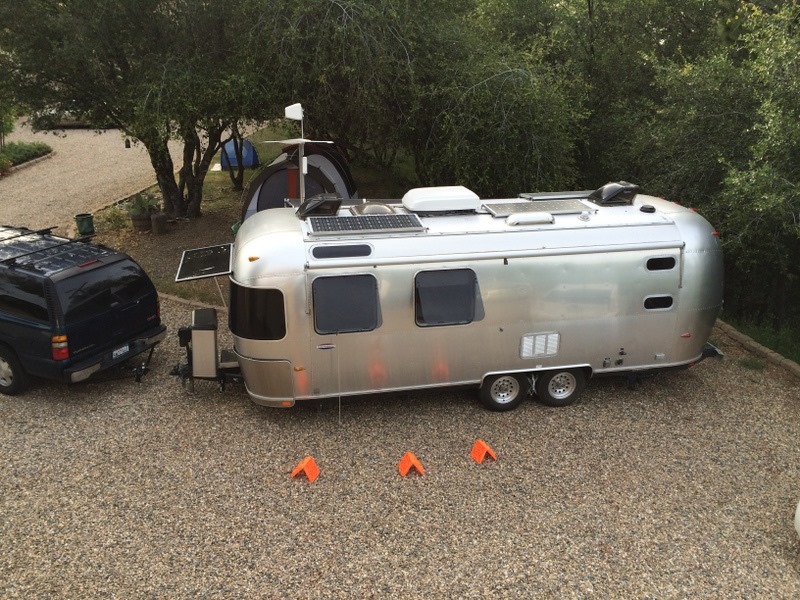
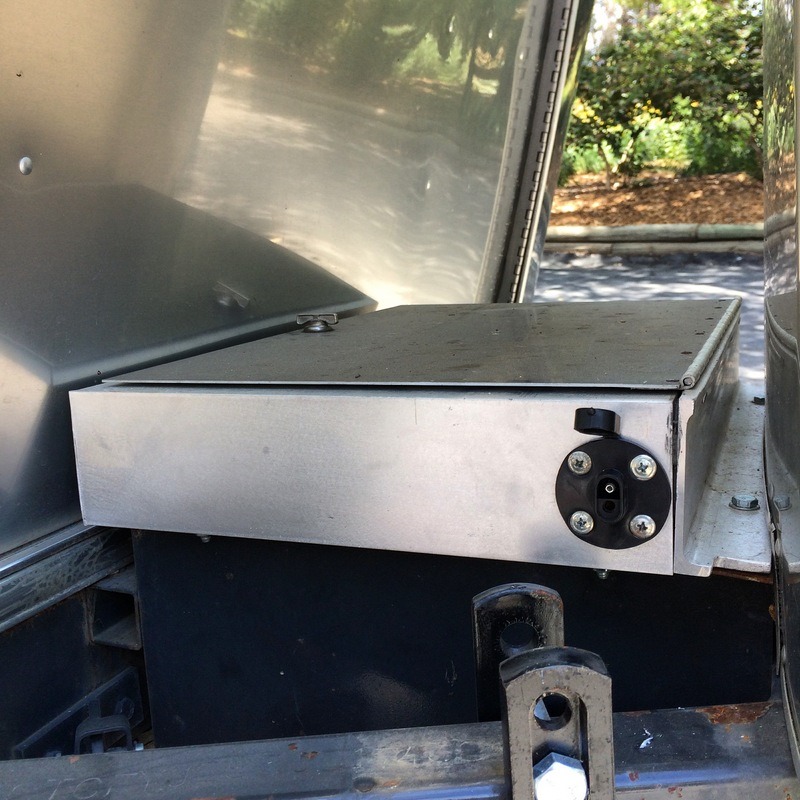
Solar panels mounted on the roof Three 135W panels (total 405W) from AM Solar run through their SunRunner Signature 25/6/PRO Core package. This system has been recommended by several Airstreamers including a well-documented install by Dave Burns (Wandering with Purpose). I installed the panels on the roof and ran the cables to the front of the trailer and then had an RV electrician do the wiring (see Inverter below). Some homemade tilt bars made from flat aluminum stock allow panels to be positioned at 45 degrees during winter months. We also have one 120W Zamp portable panel that can be extended into the sun when the trailer’s in the shade and is connected via a quick plug in the side of the battery box (for a total of 525W). A remote solar monitoring panel mounted on the end cap of the cabinet above the dinette reports amps in and out from the batteries.
Related Stories: [Removing the couch and fridge for wiring],[Replacing an old vent with a Fantastic Fan],[Planning and layout of the solar], [Panel wiring, battery box modification and antennas], [Solar and Inverter Wiring]
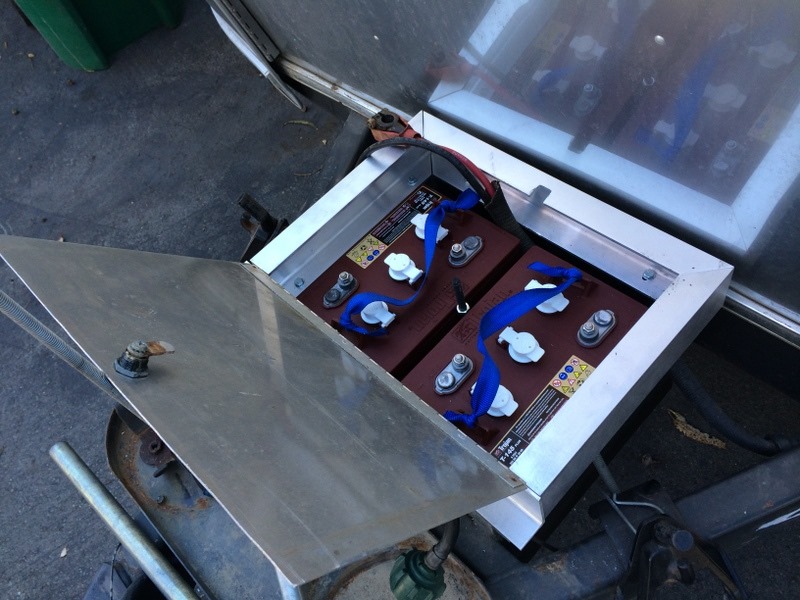
Increased battery capacity We replaced the existing batteries with two 6 volt Trojan T145’s for about 260aH of storage. For comparison, the stock Interstate Group 24 batteries hold about 150aH. We calculate that we average about 2-2.5 amps/hour so we should have power for about three days before reaching 1/2 capacity. The battery box had to be modified with some aluminum C-channel to accommodate the increased height of the batteries.  
Related Stories: [Planning and layout of the solar], [Panel wiring, battery box modification and antennas]
Inverter In the 19’ trailer, we just plugged a 300W inverter into a 12V outlet and it was enough to run the TV, Apple TV, Airport Express and a laptop. We’d just keep everything plugged into a small surge protector and switch it over to the inverter when we were on battery power. For this trailer, we installed a fixed Magnum MMS1012 1000 Watt wired to all of the outlets in the trailer, the exceptions being the fridge and the AC which will only run on shore power. Note, we removed the microwave which we don’t use and would also be too much for the inverter to handle. A remote inverter control panel was mounted on the end cap of the cabinet above the dinette under the solar remote panel.
Related Stories: [Removing the couch and fridge for wiring], [Solar and Inverter Wiring]
LED Lights The first thing we did to the new trailer (‘cause it was easy and took about 20 minutes total) was to replace all the lights with LED bulbs. Just call Dan from LED4RV.com, and he’ll hook you up. The warm white LED’s look just like the incandescents and use a fraction of the power. We actually opted for 9 bulb LED’s instead of 12 in several places because we’d always found the 12’s in our old trailer to be too bright (which might be why the new trailers have dimmers). With the indirect lighting in the CCD cabinets, reading lights over the lounge and a mod to the dinette lights (below) we have a lot of lighting options, all with a low draw.
Rear Fantastic Fan and Vent covers We replaced a manual vent in the rear with a reversible Fantastic Fan that will allow for a quick recirculation of air when used opposite the front fan. We also added smoke colored Fantastic Fan Ultra Breeze Vent Covers which will allow us to open the vents in wet conditions (and avoid the dreaded auto up and down all night) and even while rolling down the road. It’s great to be able to stop for lunch at a scenic pullout and have the trailer already be nice and cool, not to mention grocery stops when Gorilla needs to be left in the trailer.
Related Stories: [Replacing an old vent with a Fantastic Fan]
Rewired bathroom light We loved the fact that on our 19’ you could turn the light in the bathroom on in the middle of the night without having to turn the vanity light on. Strangely, on the 25’, the vanity light has to be on for the bathroom light to work. But, we came across a great post on how to make this change, and it worked like a charm.
Related Stories: [Bathroom updates, storage tweaks, a bike rack and an AC fix]
Replaced dinette lights While extending the kitchen countertop (info below), we realized we needed another light fixture, so we took the opportunity to steal one from above the dinette and replace that one with a nice looking stainless dome light. As an added feature, this light has a red bulb as well which could come in handy while checking on the baby who might be sleeping in the converter dinette. Of course, that meant the other two dinette lights had to be replaced with switchable ones so they could be turned off when the center was in “red mode.” All these options give some nice flexibility for sitting at the table as well. 
Relocated/updated thermostat Since the new TV (below) will cover the area where the current analog thermostat is mounted, we moved it higher on the same wall and at the same time replaced it with a digital programmable thermostat. Pretty nice to have the heat kick on just before having to get out of bed and entertain a toddler first thing in the morning. Also, the old one was straight out of your grandmother’s house.
Related Stories: [Panel wiring, battery box modification and antennas]
New water pump Jarred by the rattling every time we used the water, we tried several solutions to remount and replumb the water pump. In the end, we also ended up replacing it with a newer, slightly higher volume pump which quieted things down quite a bit.
Related Stories: [Bathroom updates, storage tweaks, a bike rack and an AC fix]
New water filter at kitchen sink Plumbed a 3M Filtrete water filter into the cold line at the kitchen sink for filling water bottles. Also added angle stops to make repairs easier. All fresh water is filtered at the hose but’s nice to have a secondary filter at the faucet for drinking.
Related Stories: [Setting a deadline for the maiden voyage, ready or not]
Relocated heat vents The addition of a storage cabinet just inside the front door (below) necessitated the removal of one heat vent. We also wanted to install closeable vents in the rear bedroom and bathroom, but the furnace specifications require three open vents at all times. To compensate, we added two new vents under the oven and later, added another under the fridge so can efficiently heat the main room where the kids sleep while our room stays nice and cool behind a heavy velvet curtain. We’ll likely add another curtain to close off the lounge/pullout bed area for even less space to heat.
Related Stories: [Drawer fronts and kitchen scope creep], [Stick some cork in it - Kitchen and bathroom countertops plus one for the pup]

Connectivity

Staying connected to friends and family (and the next place to camp or the solution to the latest problem)
Cell Booster While traveling with several Airstream full-timers who work from the road, we learned the power and value of cellular boosters. Of course, many of these people also have connections through two or three providers so they can choose the best one for any location, but often the signal strength still needs to be amplified. We went for a simple solution that's actually worked great for us, the Wilson Sleek Universal which is basically just a cradle to boost a single device whose data connection can then be shared through wifi. We can put either of our AT&T phones into the cradle and hotspot the connections or, more commonly, just leave the Verizon JetPack in the cradle (not always with the cradle plugged in, it gets hot and the JetPack batteries have some history of bulging with heat!) 
Wifi Booster Frankly most RV Park wifi is not really worth extending. It seems that most road warriors just do what they have to to supply their own connectivity and not worry about slow or finicky park service. We went with a cheap but capable solution of a Pepwave Surf On-The-Go . At $99, it has an external antenna port (see below) and can autoswitch between either our JetPack or any campground, library, restaurant or mooch-docking spot wifi network we can find. It also serves as our internal network for things like the Apple TV. 
Antennas Our friends at Riveted seem to like their dual antenna setup, but while looking into it, we opted to go with one omni and one directional antenna instead for more flexibility. We could hook the cell booster to the omni to generally boost coverage and then point the directional across the campground to pick up the wifi. Alternately, we could boost the campground wifi with the omni and point the directional towards a far off hilltop to bring in cell service. Links to the antennas we went with and a neat idea to mount them in the blog post linked below. 
Related Stories: [Panel wiring, battery box modification and antennas]
Air conditioner leak repair After an initial leak during hard rain was fixed by an RV repair guy with gobs and gobs of sealant, another emerged when running the AC. We traced the issue to a cracked drain pain leaking condensation into the trailer.
Related Stories: [Bathroom updates, storage tweaks, a bike rack and an AC fix]

Entertainment

Music, TV, streaming video.
New LED TV The TV that came with the trailer really shows how fast technology is moving. It was maybe a 18” 4:3 ratio LCD on a janky wall mount. We replaced it with a Haier 24” LED TV that fits perfectly on the same wall and a swivel and tilt mount that will allow it to swing 180 degrees for viewing from the bed. We also ran a new HDMI cable from the cabinet above the dinette where the AppleTV will be and another along the cable track to the couch for playing movies off the laptop.
Related Stories: [Removing the couch and fridge for wiring]
Updated/relocated 
radio
The stock radio was mounted inside of the CCD cabinet above the lounge which hangs in the center of the roof curvature with empty space on either side. Later models of the CCD extended this cabinet to fill the entire width. We installed shelves/extensions on either side and mounted a Pioneer MVHX560BT Digital Media Receiver on the right side, freeing up the cabinet for storage. Note that the stock CD player also played DVD’s and was wired to the TV via a component cable. We’ll play DVD’s off the laptop connected via the HDMI cable run to the lounge and the rest of our music via bluetooth or the USB input (which also makes a convenient charger). There was also a multi CD changer which we yanked to save space and weight. I also stuck a taller replacement antenna on the FM post in front of the front fan which actually improves radio reception. Finally, I installed a subwoofer cutoff switch in an effort to get rid of a cycling hum while the inverter was running. As an added benefit, it will decrease power usage while dry camping.
Related Stories: [Setting a deadline for the maiden voyage, ready or not], [Bathroom updates, storage tweaks, a bike rack and an AC fix]

Kitchen/DINING

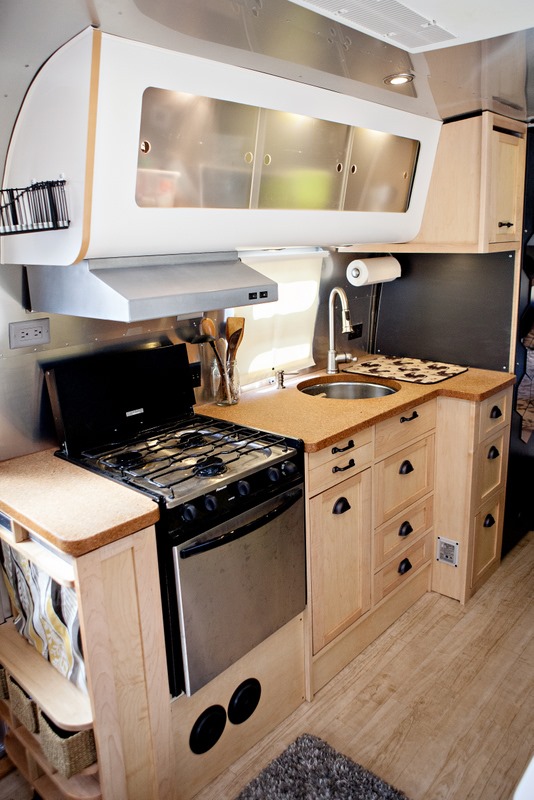
Extended countertops While surfing around one night, we came across this picture on Pinterest which shows a similar trailer to ours with the microwave removed and the countertops extended into this space. That extra space to the right of the sink allows for a drying rack, soda stream, blender or whatever while leaving space to the left for prep, all with minimal loss of cabinet storage.
Related Stories: [Finding more kitchen counterspace and building drawers]
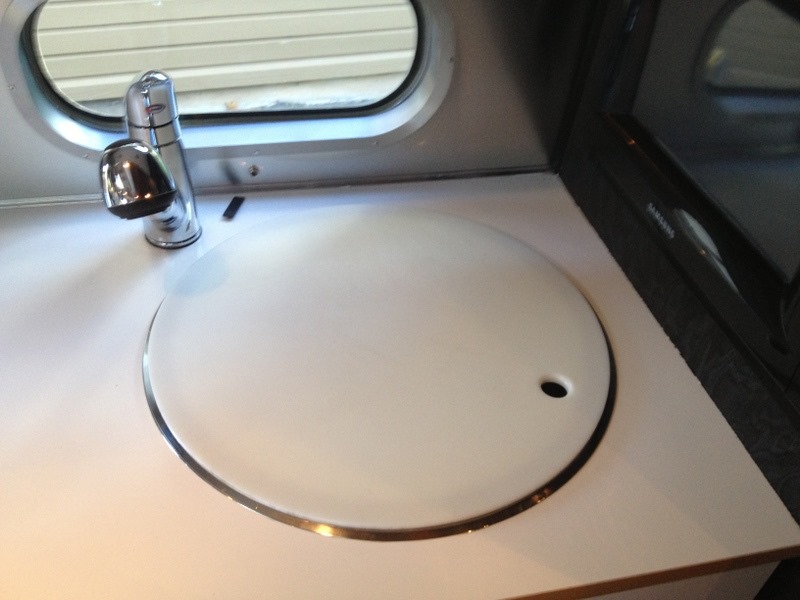
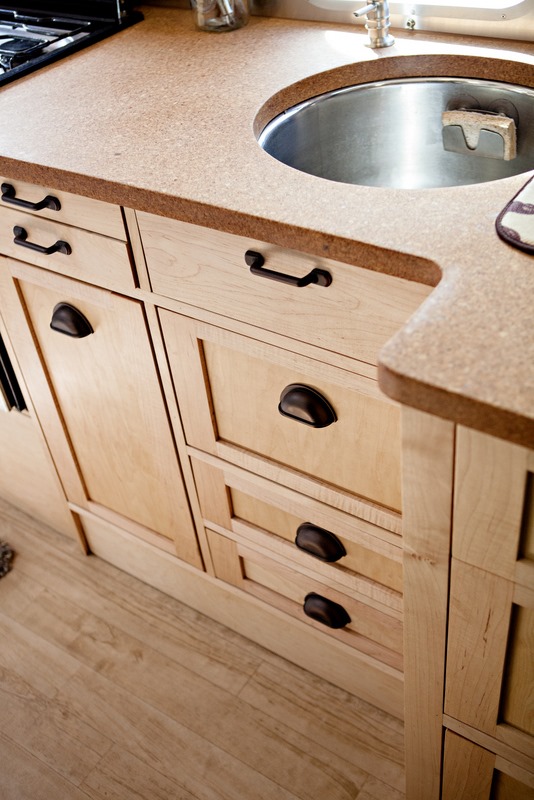
Replaced countertop material Honestly, the white melamine throughout this trailer just didn’t do it for us. Wherever possible, we wanted to replace it or cover it with a real wood or veneer. The countertops are an easy thing to replace (and needed to be extended anyway). We settled on slab cork as a renewable, lightweight, high performance material with a price point somewhere between butcher block and stone (which is way too heavy anyway). We also replaced the faucet with a taller model and installed a dish soap dispenser (we put this setup in our 19’ and really liked it). The sink cutout was repurposed as a removable cutting board.
Related Stories: [Finding more kitchen counterspace and building drawers], [Stick some cork in it - Kitchen and bathroom countertops plus one for the pup]
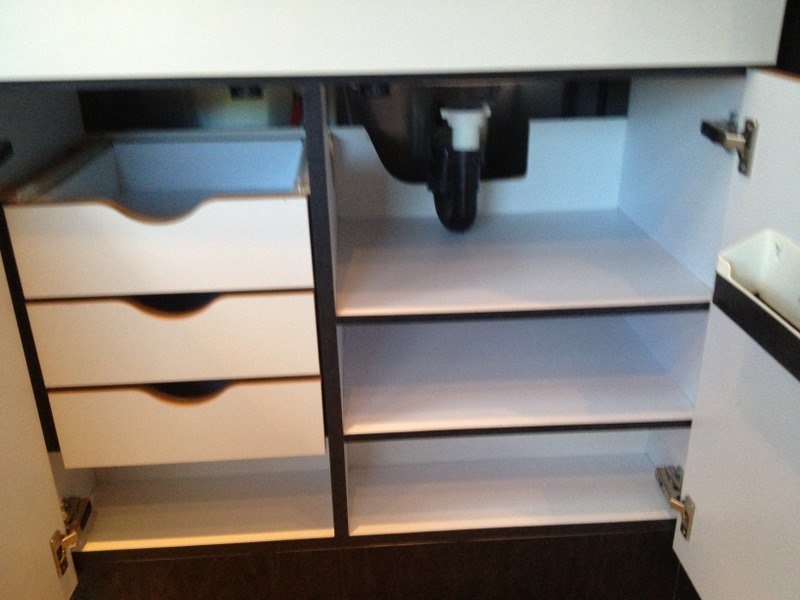
Reworked kitchen storage The storage in the cabinets beneath the kitchen countertop was pretty badly done. Of course, you lose a lot of space with bumpouts that hide ducting for the heater and some plumbing (see before pic above). Nothing to be done about that. But why you would make it so you have to open a door just to pull out a drawer, especially in a tight space? This called for a complete do-over as far as I was concerned. We gutted the cabinets, installed a full extension slider in the left bay for garbage and recycling, added two thin silverware drawer and cutting board drawers in the wasted space above (idea borrowed from Dreamstreamr) and ran new custom drawers (no doors!) all the way down the right side for tupperware, tinfoil, ziplocs, dish towels etc. For the pantry above and below the new section of countertop, we added DEEEEEEP full extension drawers with heavy duty (well, medium duty but that holds something like 150 lbs) slides for pantry items like flour, rice, pasta, canned goods, cereal, snacks, etc, and by moving the propane detector, found space for an extra drawer at the bottom.
Related Stories: [Finding more kitchen counterspace and building drawers], [Drawer fronts and kitchen scope creep], [Stick some cork in it - Kitchen and bathroom countertops plus one for the pup]
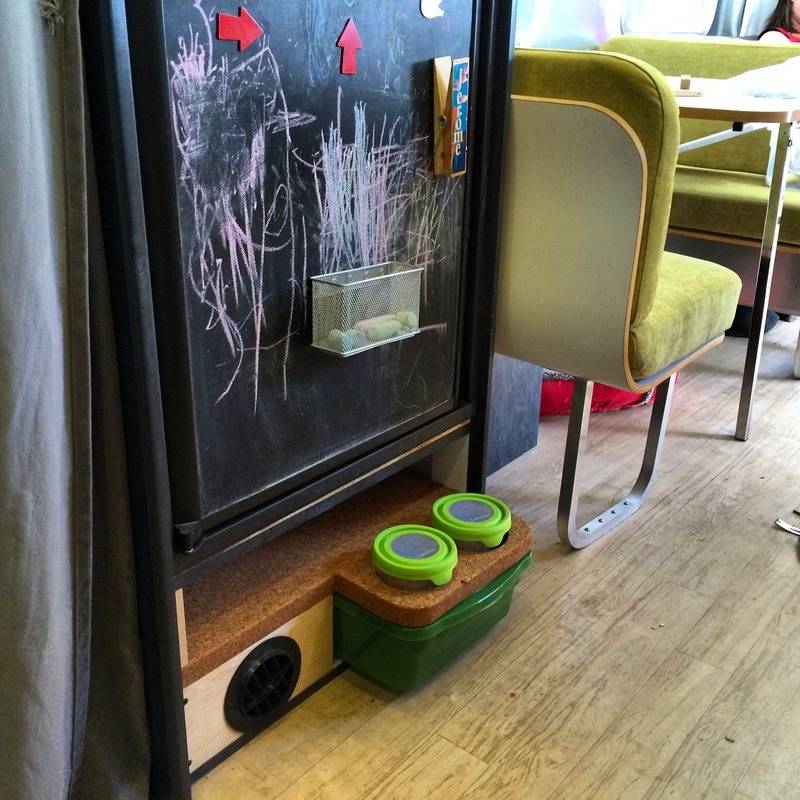
Dog bowls and food storage With a toddler on the floor and another one learning to crawl soon, it’s important for everything to have it’s place and nothing to just be left out. We’d built a dog food “station” into our 19’ and loved it. This time, we found the space underneath the fridge and built a small cork shelf with insets for two bowls with tight-fitting lids.
Related Stories: [Stick some cork in it - Kitchen and bathroom countertops plus one for the pup]

LIVING AREA

Lounge and dinette area.  
Updated CCD Cabinets Unfortunately, we liked the upper cabinets in our Flying Cloud much better than the ones in the CCD. While the CCD’s are deeper, the openings are smaller and the sliding plastic doors only allow access to one half at a time, a pain in the ass if you’re loading clothes for a trip or putting things away after a big grocery run. Not a big deal, but as mentioned above, we weren’t big fans of the white melamine, at least not with the orange interior surfaces that make the in cabinet lights (something we like) look like an amusement park. For now, we laminated roll cork onto the existing 1/4” orange interiors for a more organic reflection and soft surface for pots and dishes.
Related Stories: [Setting a deadline for the maiden voyage, ready or not]
Reupholstered couch The Airstream couch is about as comfortable as it looks. Sure there need to be some compromises for it to be useful as a slide out bed as well, but we knew we could improve upon it. We had new cushions made of thicker, higher quality foam and along with zippered, machine washable microfiber covers. Meanwhile, we saved a bit of money by stapling the same fabric to the structure of the lounge to match.
Related Stories: [Setting a deadline for the maiden voyage, ready or not]
Reworked lounge storage We pulled the door off the storage under the seat and found room for four toy baskets and some extra storage behind. Behind the lounge backrest, we removed a small storage box and completely opened up the space which will now fit a guitar, mandolin and fiddle for me and a ukulele, 1/16 scale fiddle and small keyboard for Wynne. (Don’t get your hopes up for our ability to entertain around a campfire. In addition to not being very good, we’re usually asleep by 9:30 these days!) The top of the storage is a new maple “mantle” with a wide hinged lid for easy access that makes a great spot for resting a drink while lounging. We also replaced the slides under the pullout bed with slightly longer ones and resurfaced the pullout with hardboard to make a larger and more usable play table.
Related Stories: [Setting a deadline for the maiden voyage, ready or not], [A Shakedown Weekend]
Reupholstered dinette benches The cushions with the rolls between the backrest and seat may have looked like high design when they came out but they are just not comfortable. Airstream must have figured this out ‘cause you’ll notice that the cushions in the new CCD’s are different. We had new cushions like these made of good quality foam with fabric to complement the new couch upholstery.
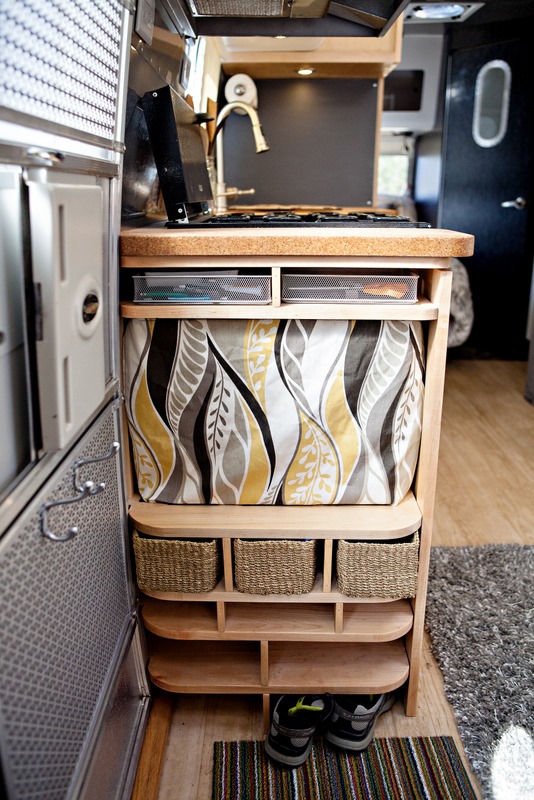
Built-in shoe storage/cat heater Just to the left of the door as you walk in was a fold up counter extension. In addition to being flimsy, it could only be used when you didn’t need to get out the door. There was also about 7” of space between the edge of the cabinets and the door frame. On our 19’, we built a platform for Gorilla’s dog bowls below a shallow cabinet with room for a few shoes below, an idea based on this pic. This time, we built a 7” deep extension of the cabinet with cubbies for adult and kids shoes, baskets for hats and gloves and the dog leash, and a swing out mount for a catalytic heater supplied by a tee off the propane supply for the stove. The new countertop extends over this cabinet, with a couple “junk drawers” beneath it.
Related Stories: [Drawer fronts and kitchen scope creep], [Setting a deadline for the maiden voyage, ready or not]
Replaced accordion divider We’ve always thought the standard accordion dividers were clumsy and just begging to be drawn on or crumpled by a kid. This one was also in the wrong place, leaving no floor space to stand while getting dressed in the “bedroom.” We used a flexible curtain track to hang a heavy velvet curtain from IKEA a little farther towards the kitchen. We also added another curtain to close off the front lounge/pull out bed section for heat efficiency and privacy that fastens to the ceiling with snaps. 
Related Stories: [Setting a deadline for the maiden voyage, ready or not]
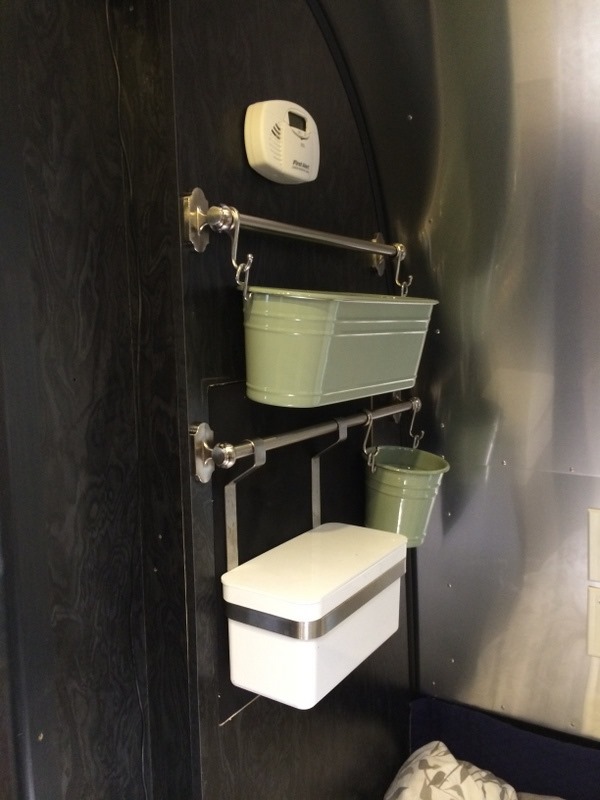
Installed diaper changing station Similar to one we’d had in the 19’, a series of hanging bins – including one with an airtight seal for “soiled” diapers – mounted on the bedroom wall puts everything at an arms reach at a time when sometimes you feel like you could use a third hand.
Related Stories: [Bathroom updates, storage tweaks, a bike rack and an AC fix]
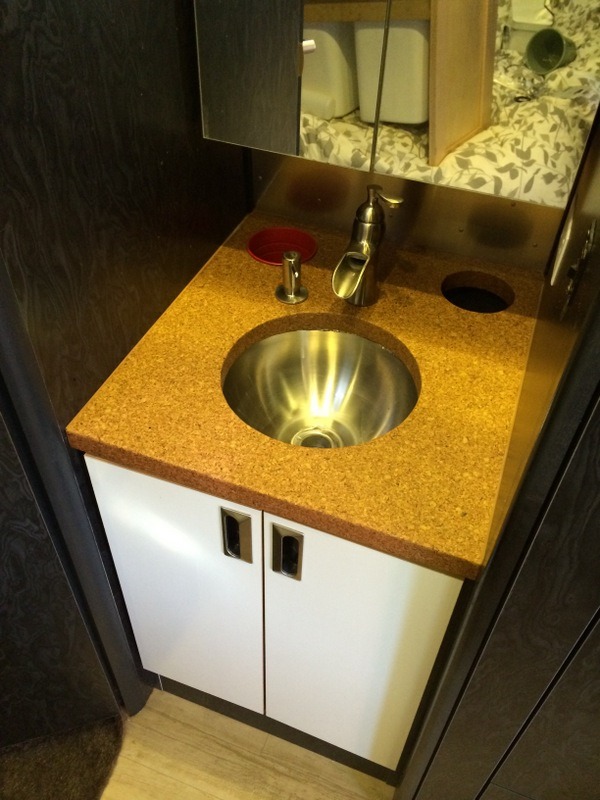
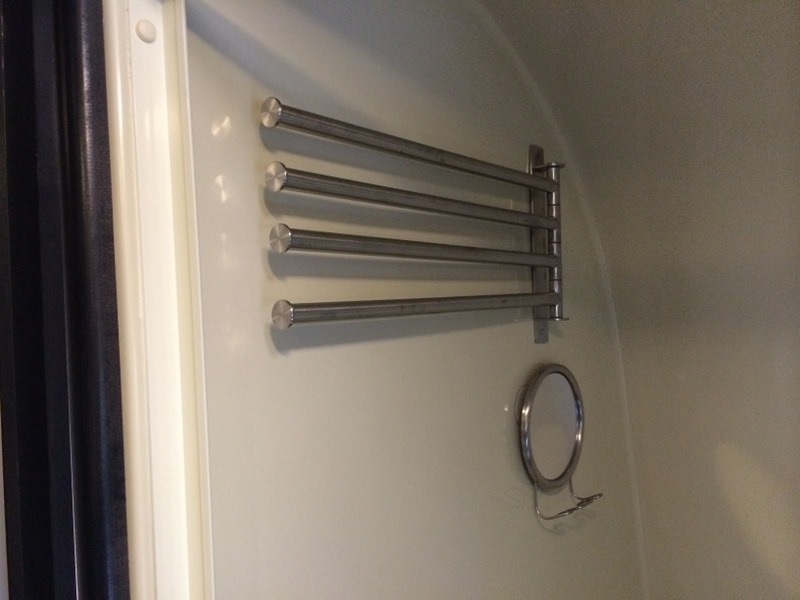
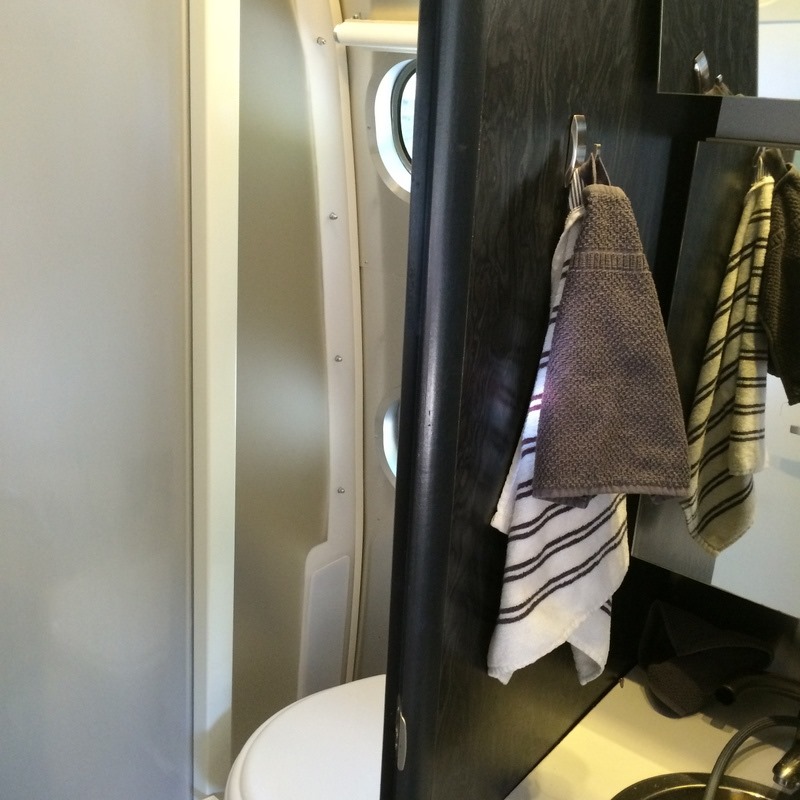
Bathroom updates After finding some rot in one of the side panels of the shower, we decided to replace it with semi-opaque, frosted acrylic panel that will let a little more light into the shower. In the process, we added an access panel for inspection and repair of the plumbing behind the shower. We put a frosted film on the lower of the two oval bathroom windows so we can leave the shade up more, remounted the shower head and some shampoo and soap holders and hung swing out towel racks and a shaving mirror. In the exterior sink area, we replaced the countertops, made use of a faucet and soap dispenser we’d bought for our house and added two inset pails for toothbrushes and a small garbage.
Related Stories: [Bathroom updates, storage tweaks, a bike rack and an AC fix], [Stick some cork in it - Kitchen and bathroom countertops plus one for the pup]

Exterior

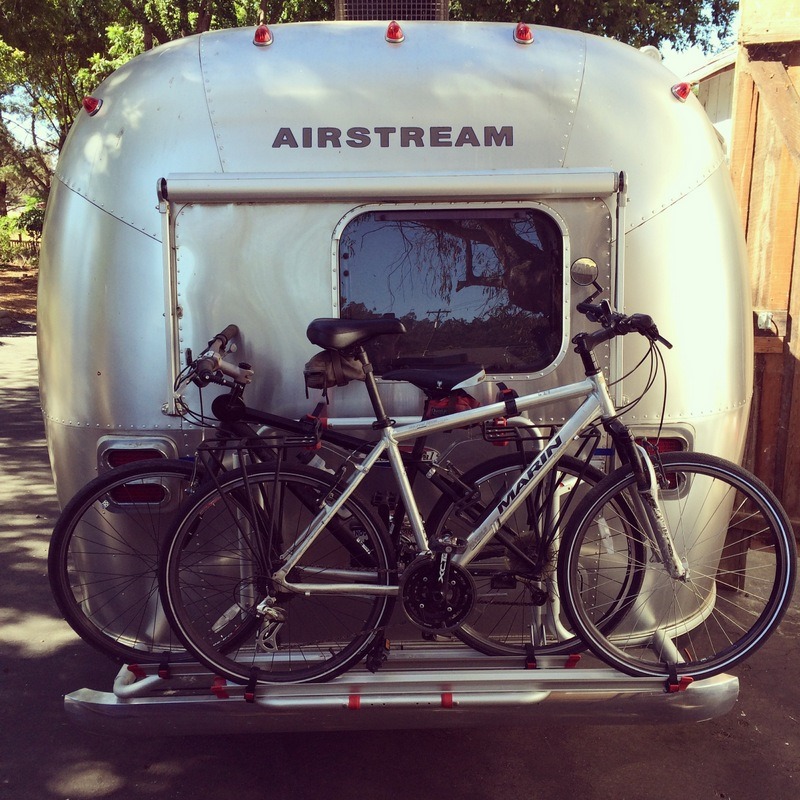
Installed Fiamma Bike Rack After considering a lot of ways to carry bikes either on the Airstream or the tow vehicle, we settled on the idea of mounting a specially designed bike rack on the rear of the trailer. Support arms secure the rack to the ribs of the body of the trailer preventing the vertical bouncing that had caused separation of the body and frame with basic hitch-mounted solutions.
Related Stories: [Bathroom updates, storage tweaks, a bike rack and an AC fix]
Upgraded tires While having the wheel bearings repacked (check out MaliMish’s tutorial if you’re considering doing it yourself), we noticed that the Goodyear Marathon tires that were on the trailer were the originals, over 9 years old (most people don’t recommend using rubber older than 3-5 years). After exhaustive searches on the Airforums, we decided to switch to a passenger car tire with an upgraded carrying capacity which would have a higher speed rating and a smoother ride than trailer tires or “E rated” heavy duty truck tires. We ultimately went with four new Michelin LTX235/75R15’s.
Ready for the after pictures? Here ya go!
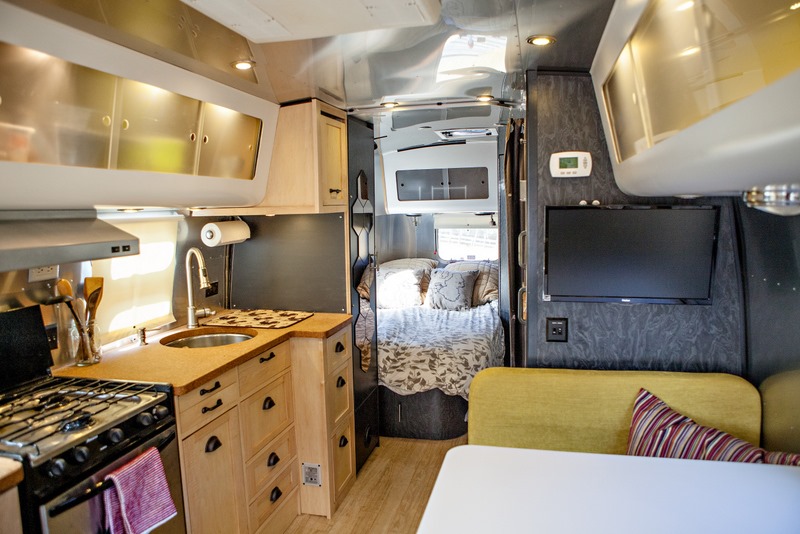
Zimmerman Airstream_13
Photo by Jess Curren, Picture Me Mine Photography
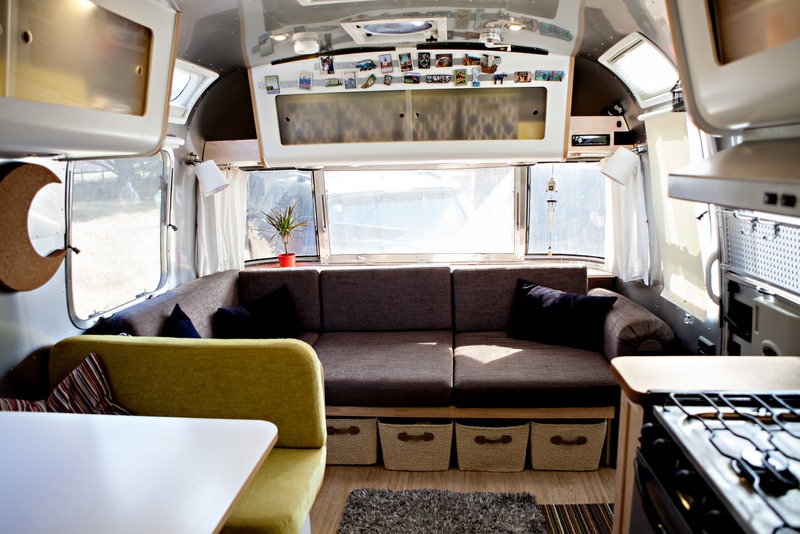
Zimmerman Airstream_09Photo by Jess Curren, Picture Me Mine Photography
Zimmerman Airstream_03 Zimmerman Airstream_01
Photos by Jess Curren, Picture Me Mine Photography
Zimmerman Airstream_04
Photo by Jess Curren, Picture Me Mine Photography
IMG_3112
IMG_2905 IMG_2558
IMG_2906 IMG_2473
IMG_2188
IMG_3033 IMG_9824
IMG_2933
IMG_2996
See ya out on the road!!

Sunday, December 1, 2013

Deciding on a New Tow Vehicle

In researching a new tow vehicle for our recently acquired 2005 25’ CCD Airstream, I spent a lot of time on the forums, both for each prospective truck and for Airstreams in general. I also reached out to a number of full-time (or close to it) Airstreamers for their thoughts. Unfortunately, there’s just not a clear answer. Discussion threads are equally inhabited by those who would say that today’s 1/2 ton pickups are so much more powerful than those of the past that they could easily handle a 25’, 6300 lb trailer and those who would claim that doing so would put not only one’s family but everyone else out on the road in grave danger. We talked to Airstreamers who’ve happily towed tens of thousands of miles with 1/2 tons and others who have upgraded to a 3/4 and say there’s no comparison.

You may remember that I did my best last year to convince myself I need one of these to bring home our latest batch of heritage piglets, but that wasn’t going to work here…

In making the choice, the issue is not typically tow rating, though there’s plenty of debate about how those numbers are derived. Instead it’s about payload. The term “1/2 ton truck” refers to the ability of early trucks to carry 1,000 lbs, one half of one ton. That number includes passengers, cargo and, depending on who you talk to, gasoline and other fluids. With most trucks that fall into that class today, payloads are listed closer to 1,500 lbs, although that also varies with trim levels (DVD players, leather seats, wood trim, moonroofs, etc all add weight to the truck). But things become really interesting when one starts to actually run the numbers on expected payload while towing.

P_Airstream

The largest load comes from the trailer resting on the hitch, referred to as tongue weight. A very rough rule of thumb puts tongue weight at about 10% of trailer weight, although most agree that 15% is closer to reality for a fully loaded trailer “ready to camp.” In our case, we’re likely looking at a tongue weight in the 900 lb range. While a weight distributing hitch can transfer that weight off the rear axle, it still needs to be carried by the truck and therefore counts towards payload. In a modern 1/2 ton truck with a 1,500 lb payload, we’d be left with 600 lbs of capacity immediately after hitching up. Subtract two adults (300 lbs combined, but I’d rather not specify exact allocations), a baby and seat (50 lbs), Gorilla and some misc in the cab (another 50 lbs), and we’d only have 200 lbs left. Two 7 gallon water jugs at 56 lbs each and we’d be down below 100 lbs before even packing the generator, portable solar panel, DC fridge, tool kit, two bikes and a baby bike seat, the Bob stroller, Wynne’s tricycle, the Weber BabyQ, camp chairs, folding camp table not to mention some room for the family to grow. Oh, and that doesn’t even factor in the weight of the truck cap (another 200 lbs at least).

badidea1

While there a few options to increase the payload up towards 2,000 lbs like Ford’s MaxPayload Package for the F150, it’s only available on newer models with the 6.5’ bed and is pretty hard to find. We’d not only be looking at a very expensive truck but one that’s just as long as a 3/4 ton and might still be over capacity. While it’s unlikely that the axles would snap the second we tossed another pound of frozen pork into the fridge, in the end, we decided that a 3/4 ton truck with a 6.5’ bed and around 2,900 lbs of payload would give us the ability to bring the things with us that we wanted while offering the confidence we were looking for while towing. Of course, the downside is that we’ll have a behemoth as a second car, and we may ultimately decide to get a cheap, fuel-efficient beater for the rare occasions Ann and I are not together. Then again, where we live out in the country, a 3/4 ton crew cab is basically considered a mid-size car.

PICT4265-700x525

New, these monsters cost over $50K, and that wasn’t going to happen. Used was the only option, and we started to familiarize ourselves with the offerings from the big three – Ford, Chevy/GMC and Dodge. Looking at a price range only a little more than what we figured we could sell our Sequoia for and with some luxuries (that we consider essential) like leather and 4x4, that put us somewhere around a 2004-2007 model year. If we were going with a 3/4 ton, it seemed we’d likely end up with a diesel, known for their torque and engine breaking, and that meant we were comparing the Powerstroke, Duramax and Cummins engines. Ask anyone who knows their stuff which diesel engine you definitely do not want to pick in those years and they’ll tell ya… Yup, that’s right, we picked that one, the 6.0L Powerstroke. Lemme ‘splain…

mini-0896e

Soon after it was introduced in 2003 to improve emissions over the widely revered 7.3L Powerstroke, 6.0L owners started reporting problems that service centers were ill-prepared to deal with, eventually leading to hundreds of buybacks and lawsuits. Sand left behind from the process of casting the engine was clogging the tight passageways of the oil cooler. Coolant could no longer flow to the Exhaust Gas Recirculation coolers (EGR’s) which had been added to send uncombusted vapor back into the engine to improve emissions. Excessive heat was leading to EGR failures which leaked coolant and caused blown head gaskets. To make matters worse, low voltage in the Fuel Injector Control Modules (FICM’s) were causing injector failures and aftermarket performance chips which could unlock up to a hundred more horsepower were leading to “over-boost conditions” the engine couldn’t handle. A bit of a sh!tsh@w, huh? You wanna go out and buy one right away don’t you? 

In fact, I had been scared away from this engine numerous times during our decision process but kept coming back to the fact that the ‘03-‘07 Ford F250 was really the only crew cab 3/4 ton in that price range with a good sized back seat and a decent looking interior. And when they ran, they ran great. In addition, these trucks are priced to reflect the bad reputation but can be “bullet-proofed” for less than this discount by addressing the well-known problems. North of $35K, we might have been able to find an ‘08 with the improved 6.4L, a reasonable number of miles and the features we wanted, but those seemed to have their own problems. Okay, the newer diesel engines also require ultra-low sulfur diesel, available from every diesel pump in the US but not on the trips to Baja with a truck camper I have somewhere in the back of my mind. Finally, and this was a bit of a big one for us while getting used to idea of driving a big truck around, the 6.0L is said to run perfectly on 100% biodiesel. While biodiesel has its issues – enough for their own blog post – it’s readily available in our area and something we’re interested in investigating.

And then the perfect truck showed up on one of the several Craigslist and dealer search windows I had open on the iPad. And it was just down the freeway about 30 minutes. And two guys were coming to look at it that evening (okay, that *might* have been a sales ploy to get me in there). And the dealership had a no strings attached 3 day no cost return policy. Sitting there in the immaculate tan leather drivers seat, scanning the unblemished head liner (which we’d been told is a great indicator of how a used vehicle has been treated) and hearing stories about how the older gentleman had come in to trade “his baby” for a small luxury SUV for his wife (okay, again, that could have been good salesmanship), I tried as hard as I could to find something wrong with it. A test drive sealed the deal. We’d driven several of these at this point and this was by far the tightest, best feeling, best sounding one yet. We signed the papers, opened the rear door for Gorilla to make the epic leap from the parking lot pavement up into her cavernous new back seat and drove our new 2006 F250 Lariat Crew Cab Shortbed Diesel home.

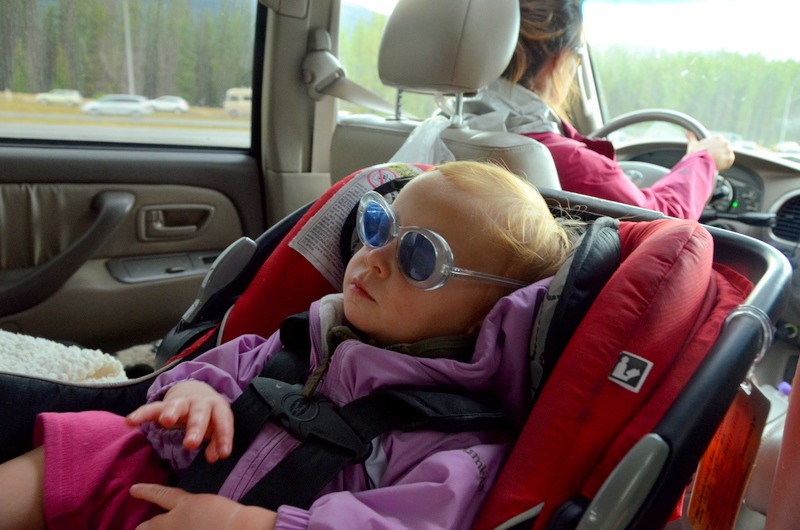
The next day, we hitched it up to the new trailer for a test tow. With Wynne’s seat securely mounted rear facing in the center position of the back bench, she could look directly out the back window and over the empty bed with absolutely no obstructions. “Ah! Home!” she said with an inflection of surprise when she saw the front of the trailer so close behind us.

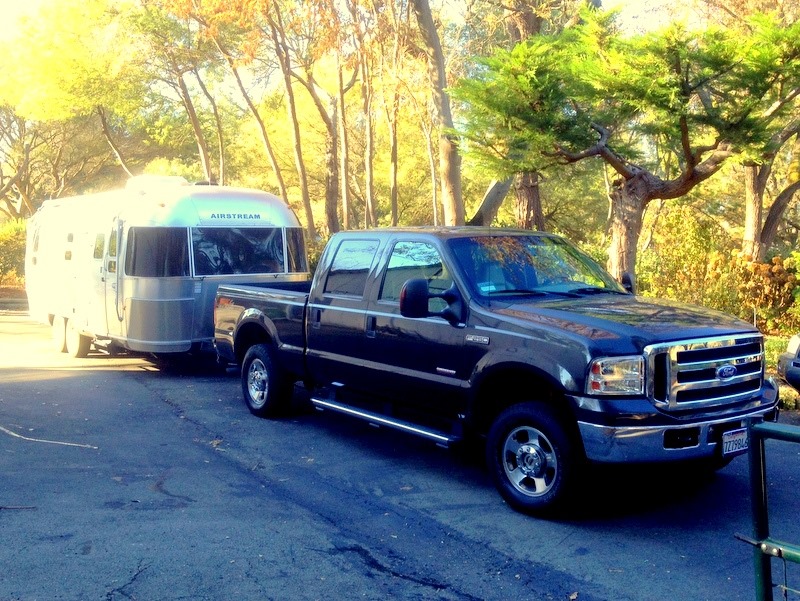
truck and trailer-001

Of course, she could have been looking at something else ‘cause when we started to pull forward with the trailer in tow, she threw up her hands, palms extended towards the back window in the universal sign for stop, and yelled “No! STAY!” at the tailgater as our new combo turned out of the driveway for the first time.

Friday, November 1, 2013

A new trailer three states away

Over the three months from August to the end of October, we’d been home a grand total of two weeks, first to meet Ann’s sisters coming out for a visit to the Farmlet in mid August and second to drop off the trailer and fly to Boston for three weeks to visit the rest of Ann’s family. And that’s where the last blog post left off, with the snow melting on the roof of the Airstream after getting surprised by an early season snow storm in the National Forest near Winnemucca. The day before that, we’d left Boise, ID after looking at what we hoped might be our next trailer, a 2005 25’ CCD model with a side dinette we’d found on CraigsList. We weren’t even outside the city limits of Boise before sending an email to the seller proposing that we send him a deposit check as soon as we got home and work out the details of getting it out to California later.

IMG_8362

The problem (in addition to our plans to be in Boston for the following three weeks) was that we weren’t sure our 2006 Toyota Sequoia with a maximum tow rating of 6200 lbs would be able to safely tow the new trailer with a max weight of 6300 lbs home from Boise. After committing to memory every discussion thread on the Airforums on tow rating and safety margins, tongue weights and axle ratings, payloads and wheel base, we decided that a new tow vehicle was going to be necessary and that a truck with a cap was going to be the best solution. While we like the flexibility and relatively small size of an SUV, we wanted to be able to carry more gear inside and less on the roof and also keep it (particularly stuff like a generator) isolated from the passenger cabin. Then Ann wouldn’t have to crawl back into the cargo area every 15 miles in search of a random squeak that was driving her nuts, and I wouldn’t have to picture the mound of hard-edged gear that would come tumbling over the back seat directly into the rear-facing baby seat if we had to slam on the brakes.

DSC_4280

Now the questions were Tundra or F150, 1/2 to or 3/4 ton, gas or diesel, Powerstroke or Duramax or Cummins. Again to the forums where our heads spun, and we waffled back and forth for the next month. Ann’s brother Andrew and I *may* have gotten a little caught up in the masquerade when we finagled a few test drives at a Boston Ford dealership, explaining that while my license was from California, I was relocating my ball-bearing and O-ring supply company to Acton and would need a truck for hauling all my what-nots and so forth. Wynne was definitely finding that running around in the back of her Uncle Andrew’s F150 was just a plain ol’ good time.

DSC_7429

When not scamming test drives, I managed to get out every few days to finally start doing some swimming before the Marin Sprint Triathlon I’d committed myself to in a couple weeks. Ann and I had been pretty good about running every other day while in the trailer and found it a great way to explore new places, but swimming had been neglected. In addition to being beautiful and peaceful, Walden Pond is a great place to train. Someone has taken the time to measure out several routes across the lake so you know exactly how far you’re swimming. Of course, that didn’t stop me from misreading the map and swimming over the distance I needed to each time. I had some good motivation to make it back to shore tho…

IMG_8715

DSC_7322 IMG_8692

By the end of a great Fall visit to New England, we’d decided on the exact truck we wanted and hatched a plan. Since neither of us was really looking forward to driving 14 hours out to Boise (even with a grandma ready and willing to have her traveling granddaughter all to herself for a few days while we did it) and we needed a new truck anyway, we set several dealers in Idaho loose trying to find the truck for us there. That way, we could fly in rockstar style, pick up the truck, hitch up the trailer and still have a few days to try it out on the way home. That’d be awesome right?! What a plan!

In keeping with our pattern, we’d planned to only be home for a week, but days passed and the departure date grew closer and still no truck matching our (admittedly detailed) needs list. Grandma was all scheduled for her overnight babysitting, the seller was standing by, but still no perfect truck. There was just always something missing from the ones the dealers were finding. I felt myself getting ready to compromise. Do we really need leather? I mean, purple grape juice and a paste-like slurry of goldfish crackers can probably be cleaned off of a cloth backseat just as easily, right? Maybe bright yellow would actually be a good color for us. It sure would help if we needed to be spotted by a rescue plane the next time we got caught in a snowstorm. And 216K miles on a diesel engine is basically just getting broken in, right? But then it hit us. We weren’t in a rush. There was no reason to compromise. Within 15 minutes, I had started an auction on uShip and was already receiving bids to transport the trailer that were much less than it would have cost us to fly out to Boise, make a bad decision on a truck and pay for campgrounds and gas on the way home. Final score? Awesome: 0, Practical: 1.

But what about grandma? She really had her heart set on having Wynne for a few days. We couldn’t really take that away from her could we? That would just be cruel. So what’d we do? We dropped the baby off right on schedule and went home. Parents can attest, the idea of just being at your own house without a toddler constantly needing attention sounds like a pretty great vacation. We slept in. We did projects. We watched movies. We did whatever, whenever. We went out to late dinners. I really didn’t want to believe Chez Panisse in Berkeley could be as good as they say, but it was!

IMG_8866

And this in contrast to our usual, but less relaxing, dinners…

IMG_5002

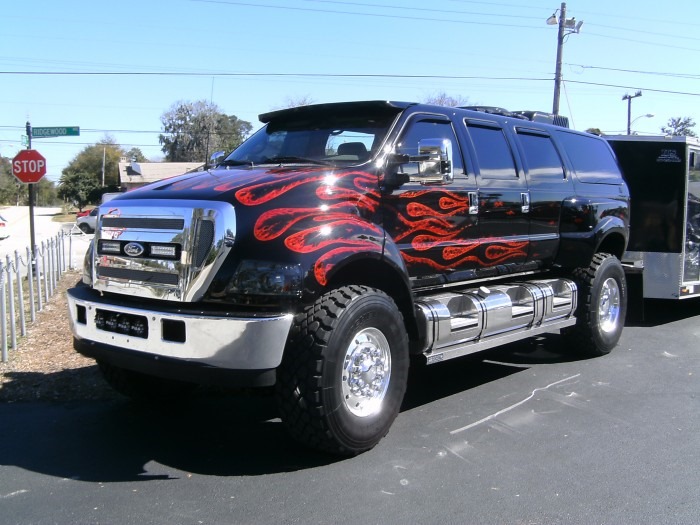
And on the last evening of our “staycation,” we got a call from our uShip shipper saying that he was a couple hours away with the trailer. Later that night, we led the bright headlights and orange running lights of his massive F-Zillion-50 truck up the easement road along the side of our property to a gate into the upper pasture. Our 19’ had always scraped a little as we entered our steep front driveway, and I didn’t feel like taking a chance at getting our new trailer permanently wedged. We figured if The Democratic Travelers had fit through the side gate, this rig should be able to. Petunia and the sheep scattered in the darkness as the lumbering load just barely squeezed through the gate leading down into the lower pasture, past the chicken coop and the feed shed and into the parking area from the opposite side.

IMG_8860

IMG_8859

As he unhitched, I made small talk with the driver. “I was tracking you on the GPS. You made pretty good time.”

“Yeah, just stopped for a little in Nevada to sleep a bit.”

“Oh, did you grab a motel or something?”

“No, I got a sleeping bag and a little bed in the back of the cab,” motioning towards the rear doors of the truck.

I laughed, “Kinda ironic when you’re towing this big nice trailer with all the comforts, huh?”

“Yeah well, if it gets real cold, we’ll definitely head back there, fire up the furnace and hang out. You know, it’s just kinda part of the deal.”

Uh, no. I don’t know. I was actually not aware that was “part of the deal…”

IMG_8862

Well, the driveway’s starting to look a bit like a dealership. Time to start getting the 19’ ready to sell (any leads are helpful or else she’ll show up on the Airstream Classifieds in a couple months). And in the next posts, I’ll dive into our decision process for our new tow vehicle and the mods we have planned for the 25’…

IMG_8891

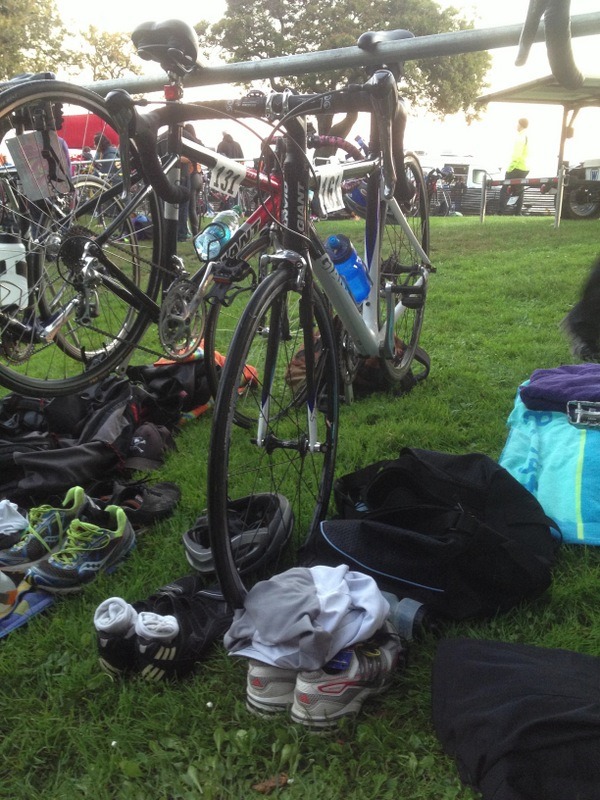
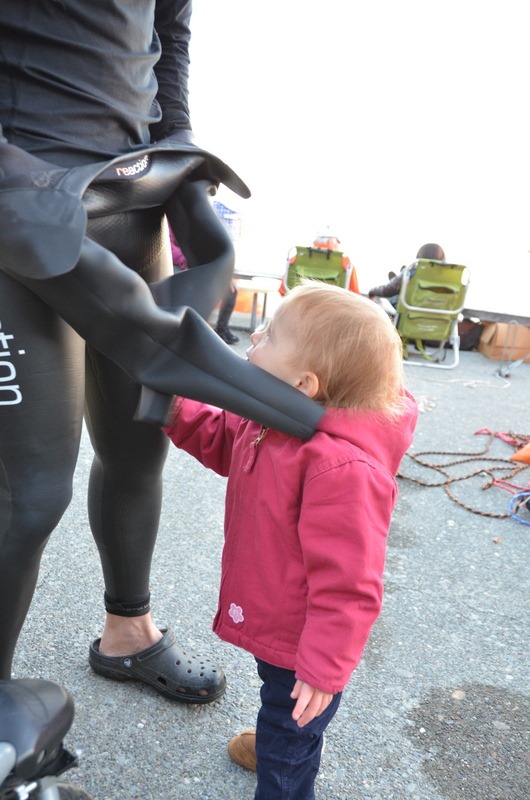
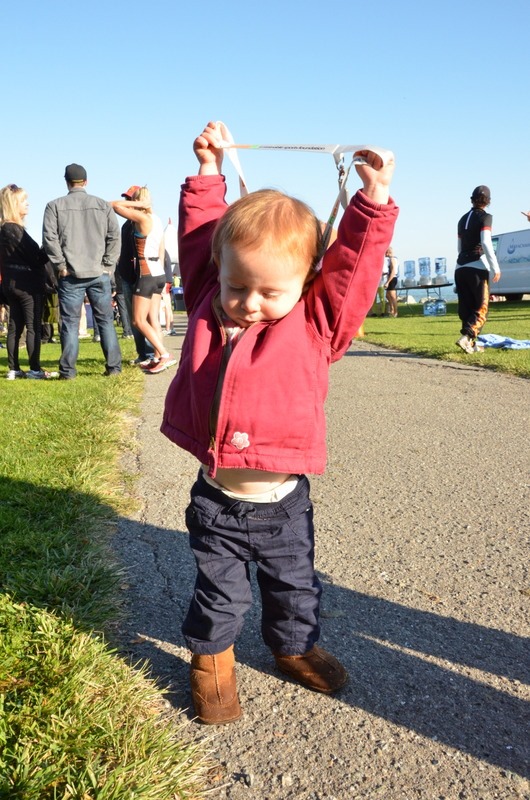
Oh, and the triathlon? I killed it. Well, let’s just say we almost killed each other… Actually, I felt pretty darn good and finished in 1:23, about where I expected.

IMG_8765 IMG_4864

IMG_8766-001

DSC_7945 DSC_7958

Swim1 bike run1

DSC_8214