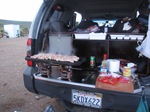
Jeeeeez, I mean your storage drawers! After seeing some great ideas in a thread on The ExPo, I started sketching and listing equipment, taking measurements and before long had a general plan for a unit that would completely fill the cargo area behind the seats of the Xterra. The design was based around two Action Packer storage boxes and the Engel 17 fridge and featured two tables that would slide out from beneath it for food cooking and food prep. Behind the ActionPackers would be an area for our personal gear (clothes, etc) accessible by folding forward the rear seats.
In addition to keeping things organized and accessible, the unit would be fully lockable and keep everything out of sight of curious eyes. As a compromise between weight and strength, I opted to build the unit out of 1/2” plywood but with plenty of support from the various dividers.
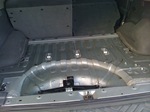
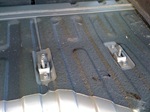
I also removed the plastic trim running across the back of the cargo area and around the latch and put aside the tool tray and jack. I would be relocating these and using the jack well as a super-secret storage spot.
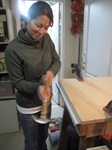
Next was a lotta trial and error to get a piece cut for the base of the unit that would fit between the wheel wells, come tight against the back seats and replace the plastic trim piece I’d removed around the latch. With the base fit, I started building up the dividers and the top deck with the cutout for the fridge top. Or rather, had my lovely assistant do it while I took pictures…
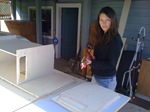
To make up for the relative lack of strength of the 1/2” ply, the whole thing is dadoed, glued and stapled. Yeah, you could get into it with a SawsAll but you’re gonna make a wholly racket doing it.
We got the idea to cover out slide out tables in stainless steel for ease of cleaning and a little bling, but after a few calls to local metal suppliers, we discovered that stainless was not cheap. We set out looking for an affordable source. We dug through the yard at a local restaurant supply auction house, searched CraigsList and eventually asked in an old school looking appliance store on Valencia, figuring they might have a scratch-and-dent panel from an old fridge lying around in the back. They didn’t but directed us to a metal fabrication shop in the Bayshore they use, specifying that we should say they sent us.
We walked through the rollup door covered with fading Chinese symbols into a warehouse workshop with sparks flying and metal squealing in pain all around us. A few workers glanced up briefly but had no interest in helping a young couple who clearly looked out of place. We finally approached someone but before we could open our mouths, he managed “Foreman, foreman” in broken English and gestured towards the back where we saw a man walking towards us.
As we described what we wanted to do, Mr. Chou interjected “Oh no!” and “Can’t do this” and “Will not work” every few sentences as if the idea of amateurs like us cutting and hammering and bending his precious material offended him to his very core. He took us around back to a mobile kitchen trailer he’d been working on. Not only did the inside look like you could eat off it, he pointed out the perfectly rounded corners of each counter top, the welds between the diamond plate backsplash and the sink, and the strong steel legs supporting the structure and once again indicated that we were not capable of this.
“Yes, yes” we agreed, we were not capable of this nor did we want this. “We’re just going to laminate some thin stainless to some plywood and hammer over the edges.”
“But you won’t have corners like this,” he said, running his fingers over the perfect union of two edges.
“We know, we don’t need that. This is for camping. Like an RV. A project.”
At this he perked up and said he liked “projects” and knew how fun it was to do something yourself. He was on the line. Now to reel him in.
“Actually, this table we’re building will be in a truck that might drive all the way around the world. We’re getting married in October and leaving the next month to drive to the southern tip of South America. If we’re still game, we’ll ship the truck to Africa and drive north to Kenya. It’s our honeymoon.”
I think I expected him to warm up and offer congratulations and of course he’d be willing to help us. Instead, he just said, “Wait here,” and disappeared into another wing of the workshop. We must have stood out there in the alley for 5 minutes absorbing the stares of the workers before he returned with two 24” x 48” sheets of 18 gauge stainless steel.
“Yeah! That’s exactly what we need! How much is it per square foot?” We’d been quoted $12/sq ft at a few places.
“I’m not the money guy, he responded. “But this is what you need?”
“Well, it’s exactly what we need but… well, how much is it a square foot?”
”Follow me.”
And with that he glanced over each shoulder, picked up the sheets of metal and walked directly under a car on the lift of the auto repair shop between the alley and the street. The mechanics didn’t give him a second look. We followed as told although we got third and fourth looks.
“Where’s your car? Here?” I unlocked the truck. He lifted the hatch and laid the $144 worth of stainless in the back. We stared blankly at him.
“Have a nice honeymoon,” he said.
Ann and I gave each other a “what the hell just happened” look and got in the car to head home. But I digress…
After some scary moments cutting the steel sheets on the table saw with a cutoff blade, we discovered that a metal blade the bandsaw was a lot less likely to eviscerate us. We covered the ply tables with construction adhesive and clamped the stainless in place. After a day to dry, we went to work hammering over and finishing the edges as best we could. Mr. Chou would have been HORIFIED but we thought it turned out pretty good.
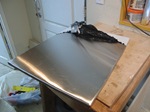
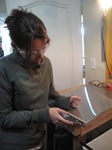
Unfortunately, once everything was assembled, we found that despite the slots for the tables being a little too tight with the addition of the stainless, the friction alone was not going to be enough to support enough weight when the tables were extended and we pretty much ended up with two stainless steel diving boards. BOING!
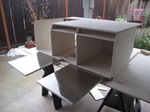
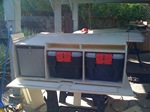
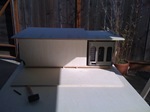
No problem. My brain took this opportunity to remind me that my original idea was a fold down table which would have the added advantage of being able to be locked, thus preventing access to the ActionPackers. I totally knew that. This was meant to be. So I cut another 1/2 ply table and this time opted to cut the stainless flush (good thing he gave us two sheets!) and trim the edges with 1/2” aluminum U channel.
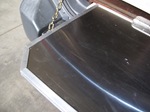
Next, we used cardboard, a sharpie and lots more trial and error to shape the hinged “wings” that would not only cover the stuff between the wheel wells and the back but would fold up to allow the unit to installed or removed. I figured out that some drawer locks worked perfectly to swing a catch between some trim on the wall of the cargo area. Wouldn’t withstand a crowbar but would certainly slow someone down.
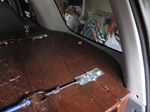
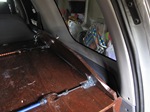
I also shaped two sheets to extend forward from the back deck towards the front seats (with the rear seats down) to be used as a sleeping platform (if needed for security, etc). I cut some legs (2 long ones for each sheet that extend down into the passenger foot wells and 2 short ones each that rest on the cargo floor) and fitted them with threaded posts that screw into t-nuts in the platform. The reality is that with the platform extended, space is pretty tight to the ceiling so I don’t know how usable it will be be. But, take four legs of the same length and screw them into the platform and you’ve got a nice camp table! BTW, the platforms store under the mattress in the roof tent.
After the 10 day Baja Shakedown, we’re lovin’ the setup!
